


The content below is taken from the original ( Manage Microsoft’s 90-day license assignment rules with AWS License Manager), to continue reading please visit the site. Remember to respect the Author & Copyright.
AWS License Manager makes it easier to manage your software licenses across AWS and on-premises environments. AWS License Manager lets administrators create customized licensing rules that emulate the terms of their licensing agreements, apply these rules to keep track of licenses used, and control whether an Amazon Elastic Compute Cloud (Amazon EC2) instance should be launched.
In the case of Microsoft workloads such as Windows and SQL Server, you can use the simplified bring-your-own-license (BYOL) opportunities in AWS License Manager to effectively govern and automate the management of software licenses that require dedicated physical hardware.
In a BYOL scenario where licenses are not covered by Software Assurance with mobility rights, Microsoft requires customers to manage the 90-day license reassignment restriction, under which you cannot reassign a license to a new device unless 90 days have passed from the initial assignment. To help customers simplify managing Microsoft’s 90-day license reassignment restriction, AWS License Manager has added the ability to enforce license assignment rules with EC2 Dedicated Hosts. By using License Manager, you can ensure that you are compliant with the 90-day license assignment rule.
In this blog post, I show you how to create and enforce a 90-day license limit rule for SQL Server.
Prerequisites
- An AWS account with permissions to access Amazon EC2, AWS Identity and Access Management (IAM), and AWS Systems Manager. If you do not have permissions, contact your security team.
- An IAM instance profile for Systems Manager.
- Instances launched as part of this blog post should have the IAM instance profile attached.
Walkthrough
Step 1: Create a license configuration
- Open the AWS Management Console, and under Management & Governance, open the AWS License Manager console.
- In the left navigation pane, choose Customer managed licenses, and then choose Create customer managed license.
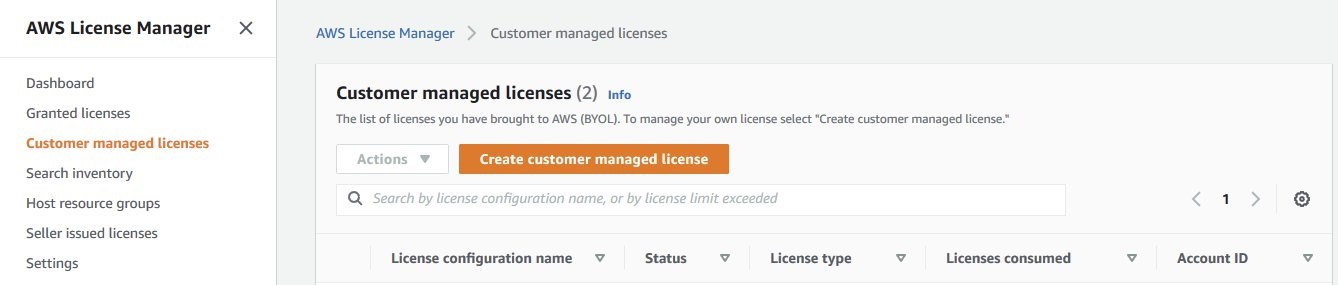
Figure 1: Customer managed licenses page
You will need the following details for your license configuration:
-
- License configuration name: Identifies your license configuration and its resource associations. Enter a descriptive name (for example,
SQL Server Enterprise licenses). - Description (optional): Enter brief information about the license.
- License type: Choose Cores because you will be licensing the physical cores of the Dedicated Host.
- Number of cores (optional): Indicate the number of licenses that you own. License Manager uses this information to help you manage the number of licenses used by your organization. In this example, I use 48, which is the number of physical cores in an r5 Dedicated Host.
- Enforce license limit: Select this checkbox to limit licensing overuse based on the number of license types. License Manager blocks instance launches after available license types are exhausted.
- Rules (optional):
- Under Rule type, choose Tenancy and for Rule value, choose Dedicated Host. As mentioned in the introduction, Microsoft’s 90-day license reassignment restriction applies to BYOL on dedicated physical hardware.
- Under Rule type, choose License affinity to host (in days) and for Rule value, enter 90 to enforce Microsoft’s 90-day license reassignment restriction.
- Automated discovery rules (optional): Leave blank.
- License configuration name: Identifies your license configuration and its resource associations. Enter a descriptive name (for example,
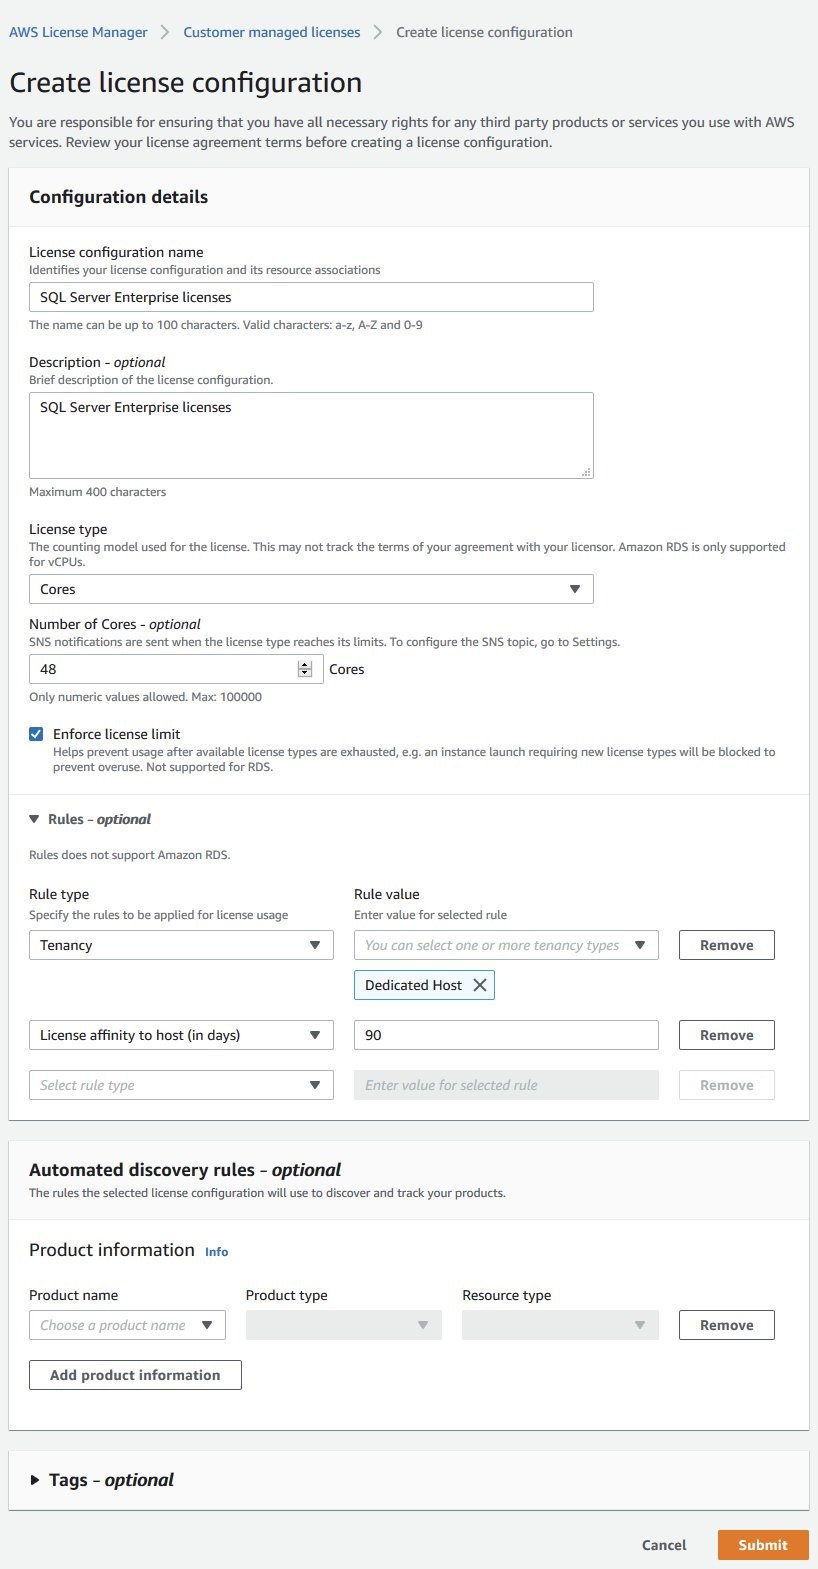
Figure 2: Create license configuration page
- Choose Submit to create the license configuration.
Step 2: Associate an AMI (optional)
When you associate an Amazon Machine Image (AMI) with a license configuration, EC2 instances can be launched into the host resource group associated with that license configuration. A host resource group is a collection of Dedicated Hosts that you can manage as a single entity.
- Under Customer managed licenses, choose the license configuration you created in the previous step.
- From Actions, choose Associate AMI.
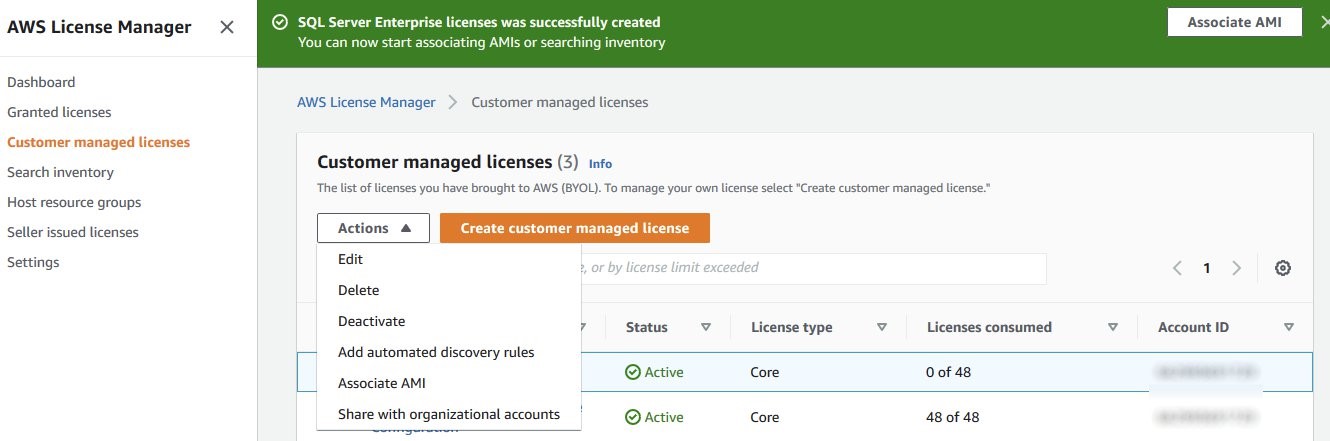
Figure 3: Associate AMI option in Actions menu
- Choose one or more AMIs and then choose Associate.
Step 3: Create a host resource group
The next step is to create a host resource group.
- From the left navigation pane, choose Host resource groups, and then choose Create host resource group.
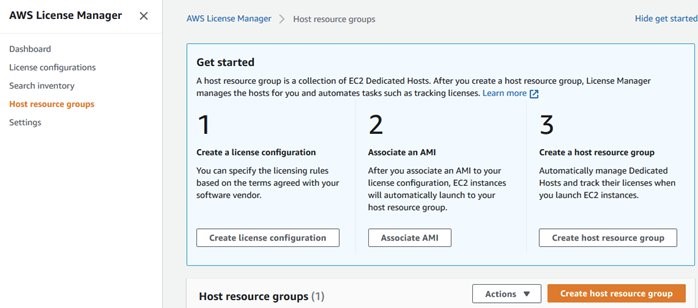
Figure 4: Host resource groups page
You will need the following details for your host resource group:
- Host resource group name: Identifies your host resource group and its resource associations. Enter a descriptive name (for example,
SQL_Server_group). - Description (optional): Enter brief information about the host resource group.
- Share host resource group with all my member accounts. Leave this option cleared. When selected, it allows instances to be launched into the host resource group from member accounts.
- EC2 Dedicated Host management settings
- Allocate hosts automatically. Select this option, which allocates a new host if additional capacity is required to launch an instance.
- Release hosts automatically. Select this option, which releases hosts when they no longer have an active instance running on them. This helps drive down costs.
Note: In the use case in this post, selecting this option releases the Dedicated Host as soon as the last instance on it is terminated, but licenses allocated to the Dedicated Host remain unavailable for reassignment until the 90-day limit has expired. AWS encourages customers to do their own due diligence when using the Release hosts automatically setting.
-
- Recover hosts automatically. Select this option, which moves instances to a new host in case of unexpected host failures.
Note: Microsoft’s 90-day assignment rule does not apply if the reassignment is due to permanent hardware failure or loss. Because there is no definition of what constitutes a permanent hardware failure or loss in Microsoft’s license terms, AWS encourages customers to do their own due diligence when using the Recover hosts automatically setting with license affinity rules.
- Instance families: Because this example is for SQL Server, I use the memory-optimized r5 family.
- Associated license configurations: Choose the license configuration you created earlier.
- Choose Create to create your host resource group.
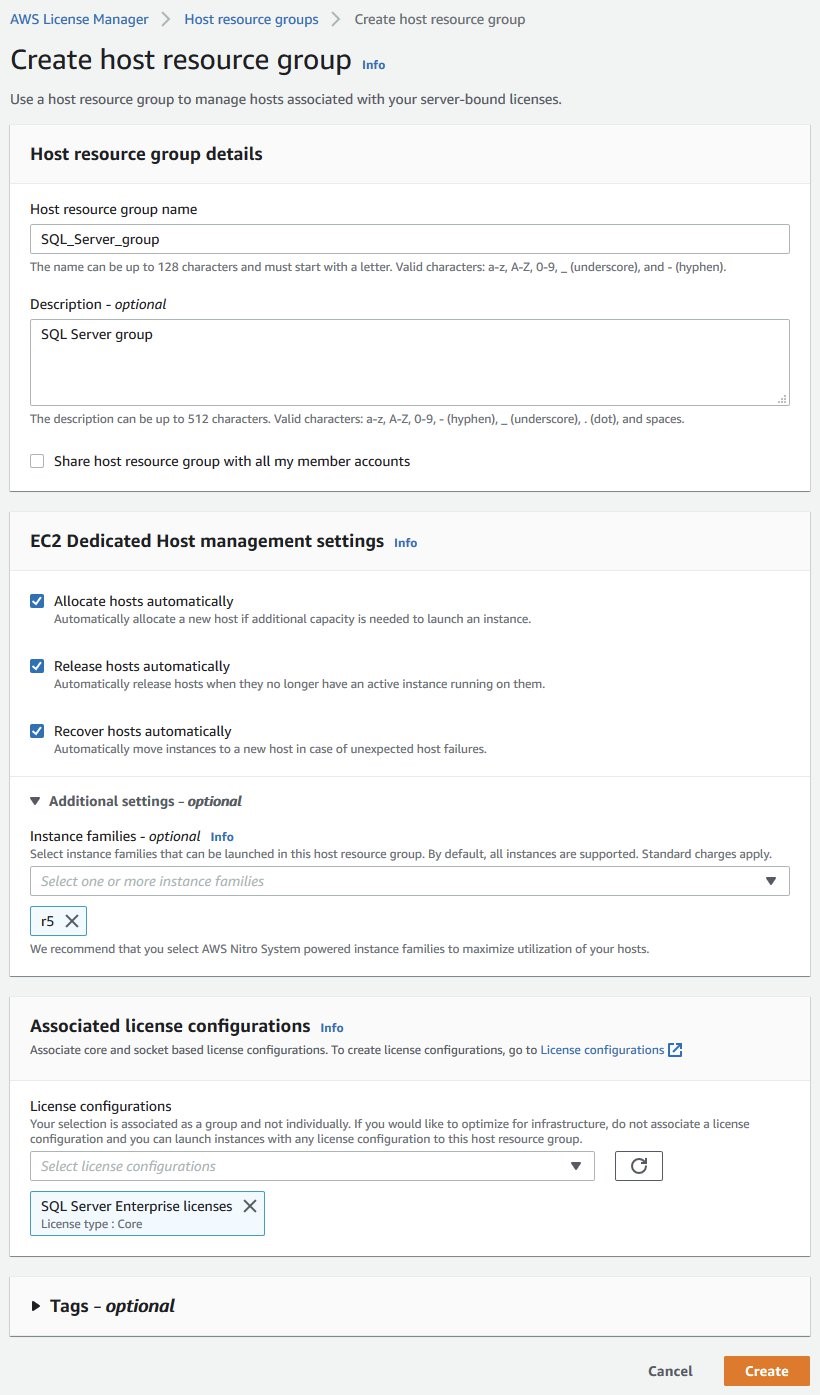
Figure 5: Create host resource group page
Step 4: Launch instances into the host resource group
Now use a launch template to launch an r5.xlarge instance into the host resource group. For information about how to create launch templates, see Launch an instance from a launch template in the Amazon EC2 User Guide for Linux Instances.
Launching an instance through the launch template provisions the Dedicated Host in the SQL_Server_group. Figure 6 shows that the license configuration you created is now tracking Core usage.
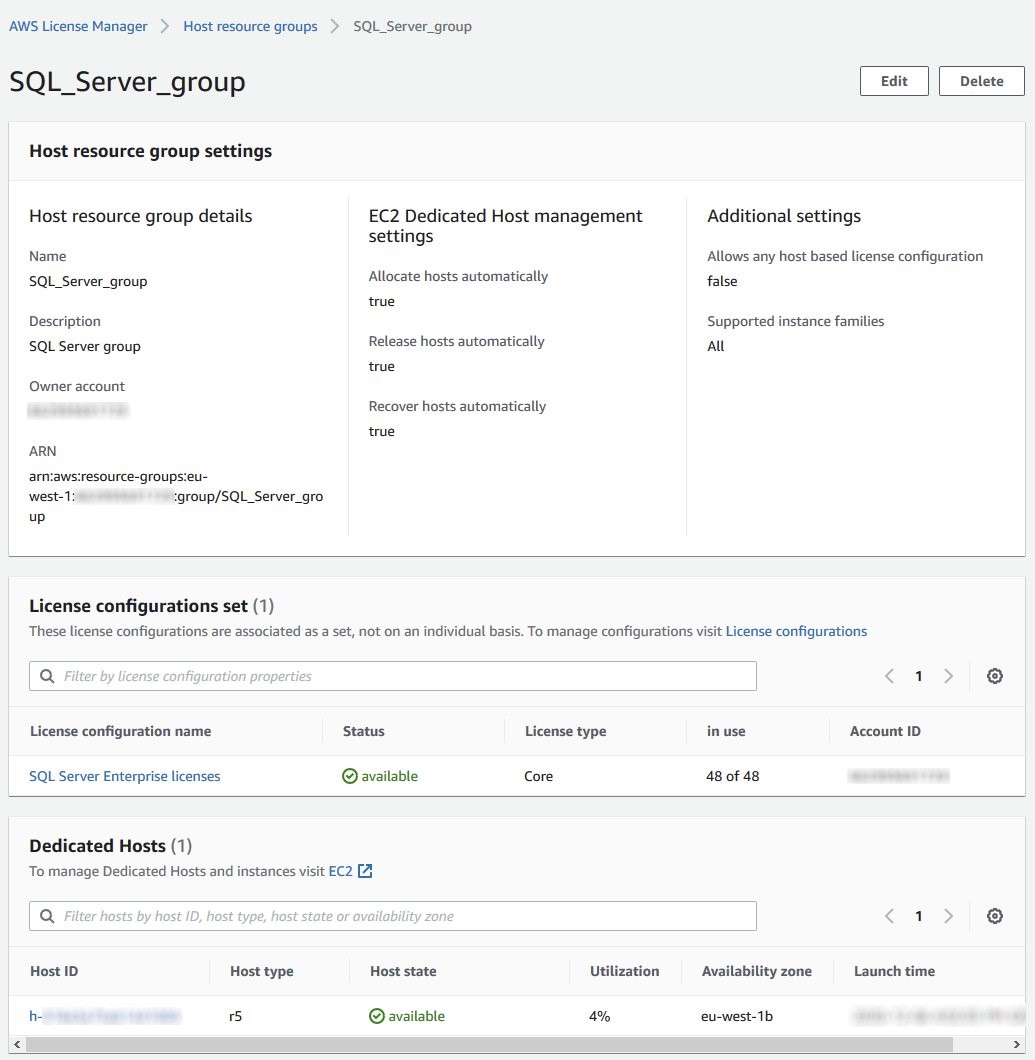
Figure 6: SQL_Server_group
Choose the Dedicated Host ID. Figure 7 shows that the r5.xlarge instance has been launched and is operational.
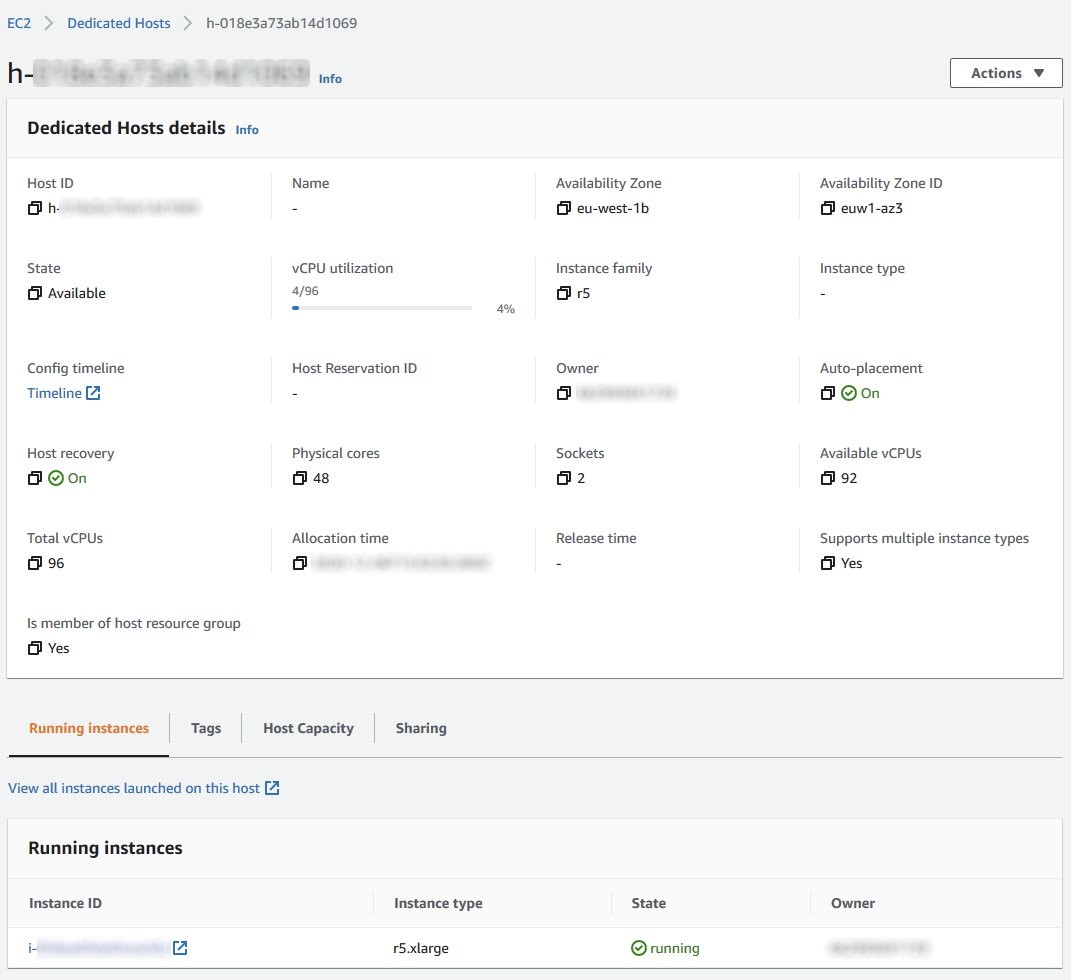
Figure 7: Dedicated Host details
In the AWS License Manager console, choose Customer managed licenses to verify that licenses are being tracked and all 48 cores configured in step 1 are assigned and consumed.

Figure 8: SQL Server Enterprise licenses
The AWS License Manager dashboard shows that a license limit is enforced, as configured in step 1. This means that you can launch r5 instances in the host resource group as long as they fit into the one Dedicated Host. AWS License Manager will block the launch of any additional hosts because the license limit has been reached.

Figure 9: AWS License Manager Dashboard
Step 5: Release the Dedicated Host and confirm 90-day limit assignment rule is enforced
Terminate the r5.xlarge instance on the provisioned Dedicated Host. Because you have created the host resource group with the Release hosts automatically setting, AWS License Manager releases the host after all instances on that host are terminated. You can also release the host manually.
Figure 10 shows that after the instances are terminated, the Dedicated Host’s utilization drops to 0%.
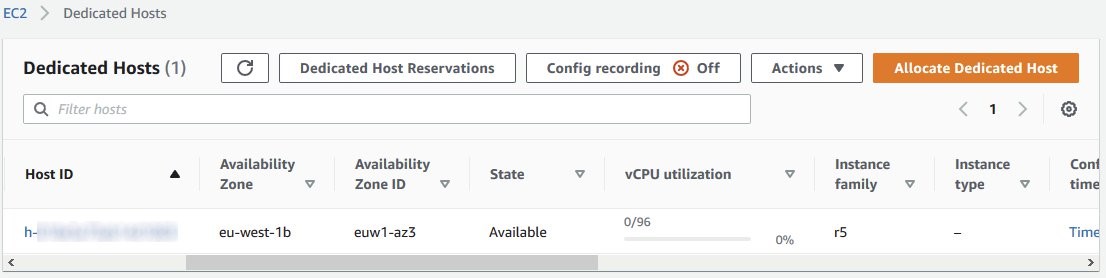
Figure 10: Dedicated Hosts page
Shortly after the host is released, it no longer appears in the host resource group.
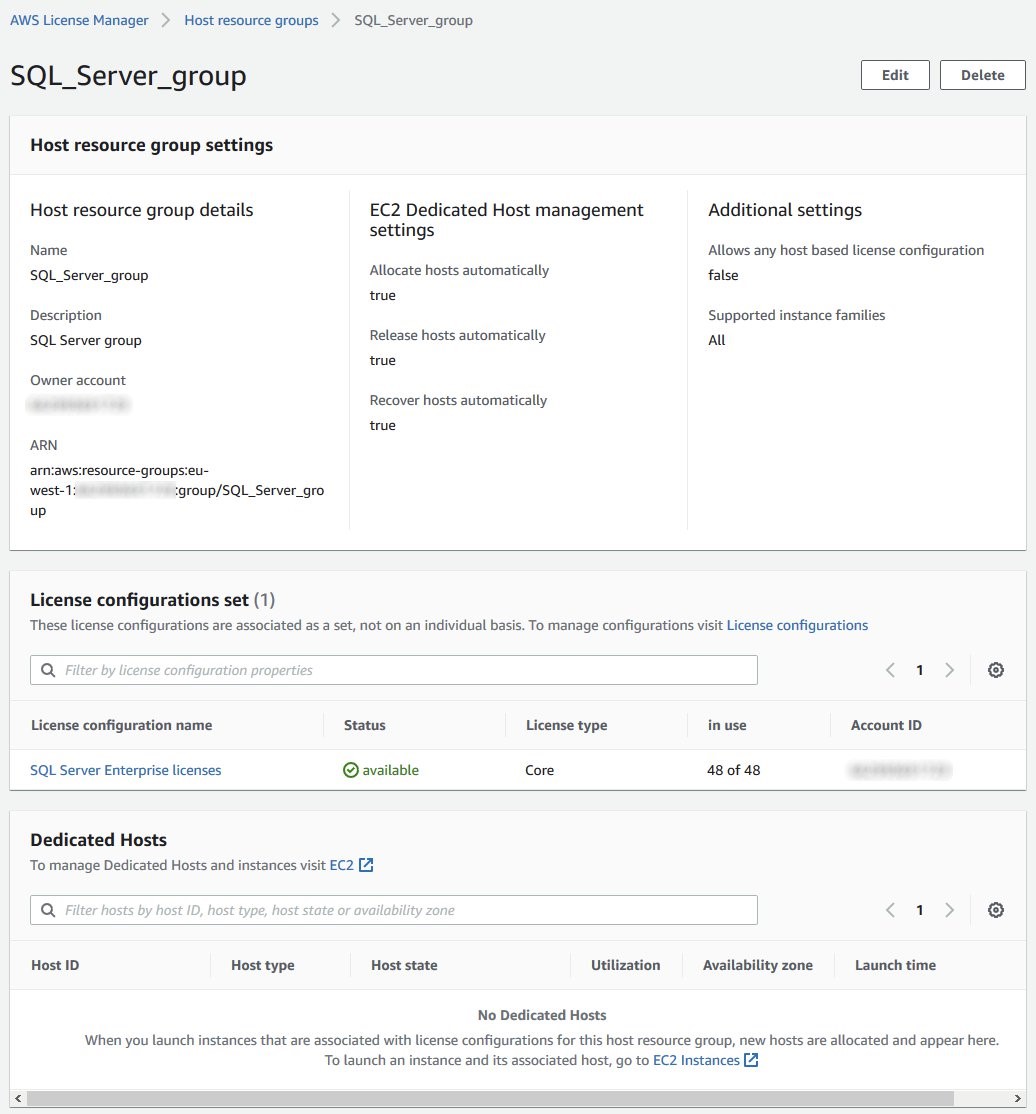
Figure 11: Dedicated Hosts for SQL_Server_group
The 48 Core licenses assigned to that host remain reserved. They are unavailable for reuse elsewhere for 90 days from the time the Dedicated Host was launched.
Figure 12 shows this information is also displayed in the dashboard.
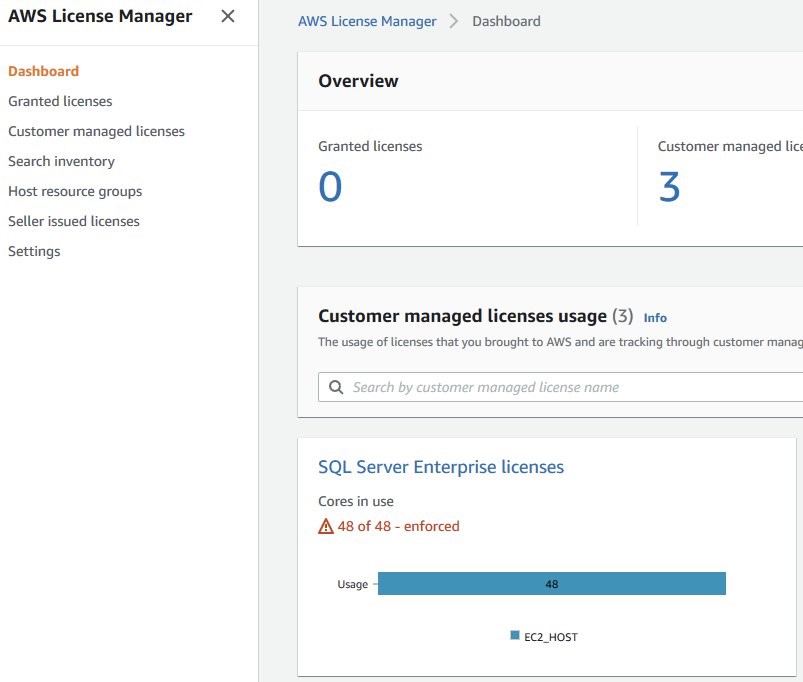
Figure 12: Cores in use in the dashboard
Cleanup
- From the EC2 console, delete the launch template you created in step 4.
- From the AWS License Manager console, delete the host resource group you created in step 3.
- From the AWS License Manager console, click on Customer managed licenses, then click on the license configuration you created in step 1, and under Associated AMIs click on the check box next to the AMI ID and disassociate the AMI
- From the AWS License Manager console, click on Customer managed licenses and delete the License Configuration you created in step 1.
- Delete the IAM instance profile for Systems Manager created as part of the prerequisites.
Conclusion
In this blog post, I showed how AWS License Manager helps you manage and enforce the 90-day reassignment limit for Microsoft licenses. For more information about AWS License Manager, see the AWS License Manager User Guide.
About the Author

Andreas is a Senior Specialist Solutions Architect for Microsoft workloads at Amazon Web Services. He has more than 20 years of experience on Microsoft technologies, Systems Security, Identity, Datacenter Migrations, and Enterprise Architecture. He is passionate about helping customers migrate to, and realize the full benefits of the cloud.