The content below is taken from the original ( Amazon Braket – Get Started with Quantum Computing), to continue reading please visit the site. Remember to respect the Author & Copyright.
Nearly a decade ago I wrote about the Quantum Compute Cloud on April Fool’s Day. The future has arrived and you now have the opportunity to write quantum algorithms and to run them on actual quantum computers. Here’s what we are announcing today:
Amazon Braket – A fully managed service that allows scientists, researchers, and developers to begin experimenting with computers from multiple quantum hardware providers in a single place. Bra-ket notation is commonly used to denote quantum mechanical states, and inspired the name of the service.
AWS Center for Quantum Computing – A research center adjacent to the California Institute of Technology (Caltech) that will bring together the world’s leading quantum computing researchers and engineers in order to accelerate development of quantum computing hardware and software.
Amazon Quantum Solutions Lab – A new program to connect AWS customers with quantum computing experts from Amazon and a very select set of consulting partners.
What’s Quantum Computing
Ordinary (classical) computers use collections of bits to represent their state. Each bit is definitively 0 or 1, and the number of possible states is 2n if you have n bits. 1 bit can be in either of 2 states, 2 bits can be in any one of 4 states, and so forth. A computer with 1 MiB of memory has 2(8*1048576) states, excluding CPU registers and external storage. This is a large number, but it is finite, and can be calculated.
Quantum computers use a more sophisticated data representation known as a qubit or quantum bit. Each qubit can exist in state 1 or 0, but also in superpositions of 1 and 0, meaning that the qubit simultaneously occupies both states. Such states can be specified by a two-dimensional vector that contains a pair of complex numbers, making for an infinite number of states. Each of the complex numbers is a probability amplitude, basically the odds that the qubit is a 0 or a 1, respectively.
A classical computer can be in just one of those 2n states at a given time, but a quantum computer can occupy all of them in parallel.
If you have been in IT for any length of time, you know that Moore’s Law has brought us to the point where it possible to manufacture memory chips that store 2 tebibytes (as I write this) on a thumb drive. The physical and chemical processes that make this possible are amazing, and well worth studying. Unfortunately, these processes do not apply directly to the manufacture of devices that contain qubits; as I write this, the largest quantum computers contain about 50 qubits. These computers are built on several different technologies, but seem to have two attributes in common: they are scarce, and they must be run in carefully controlled physical environments.
How it Works
Quantum computers work by manipulating the amplitudes of the state vector. To program a quantum computer, you figure out how many qubits you need, wire them together into a quantum circuit, and run the circuit. When you build the circuit, you set it up so that the correct answer is the most probable one, and all the rest are highly improbable. Whereas classical computers use Boolean logic and are built using NOT, OR, and AND gates, quantum computers use superposition and interference, and are built using quantum logic gates with new and exotic names (X, Y, Z, CNOT, Hadamard, Toffoli, and so forth).
This is a very young field: the model was first proposed in the early 1980s, followed shortly by the realization that a quantum computer could perform simulations of quantum mechanical systems that are impossible on a classical computer. Quantum computers have applications to machine learning, linear algebra, chemistry, cryptography, simulations of physics, search, and optimization. For example, Shor’s Algorithm shows how to efficiently factor integers of any size (this video has a really good explanation).
Looking Ahead
Today’s implementations of public key cryptography are secure because factoring large integers is computationally intensive. Depending on key length, the time to factor (and therefore break) keys ranges from months to forever (more than the projected lifetime of our universe). However, when a quantum computer with enough qubits is available, factoring large integers will become instant and trivial. Defining “enough” turns out to be far beyond what I can cover (or fully understand) in this blog post, and brings in to play the difference between logical and physical qubits, noise rates, error correction, and more!
You need to keep this in mind when thinking about medium-term encryption and data protection, and you need to know about post-quantum cryptography. Today, s2n (our implementation of the TLS/SSL protocols) already includes two different key exchange mechanisms that are quantum-resistant. Given that it takes about a decade for a new encryption protocol to become widely available and safe to use, it is not too soon to look ahead to a time when large-scale quantum computers are available.
Quantum computing is definitely not mainstream today, but that time is coming. It is a very powerful tool that can solve certain types of problems that are difficult or impossible to solve classically. I suspect that within 40 or 50 years, many applications will be powered in part using services that run on quantum computers. As such, it is best to think of them like a GPU or a math coprocessor. They will not be used in isolation, but will be an important part of a hybrid classical/quantum solution.
Here We Are
Our goal is to make sure you know enough about quantum computing to start looking for some appropriate use cases and conducting some tests and experiments. We want to build a solid foundation that is firmly rooted in reality, and to work with you to move into a quantum-powered future.
Ok, with that as an explanation, let’s get into it!
Amazon Braket
 This new service is designed to let you get some hands-on experience with qubits and quantum circuits. You can build and test your circuits in a simulated environment and then run them on an actual quantum computer. Amazon Braket is a fully managed AWS service, with security & encryption baked in at each level.
You can access Amazon Braket through a notebook-style interface:
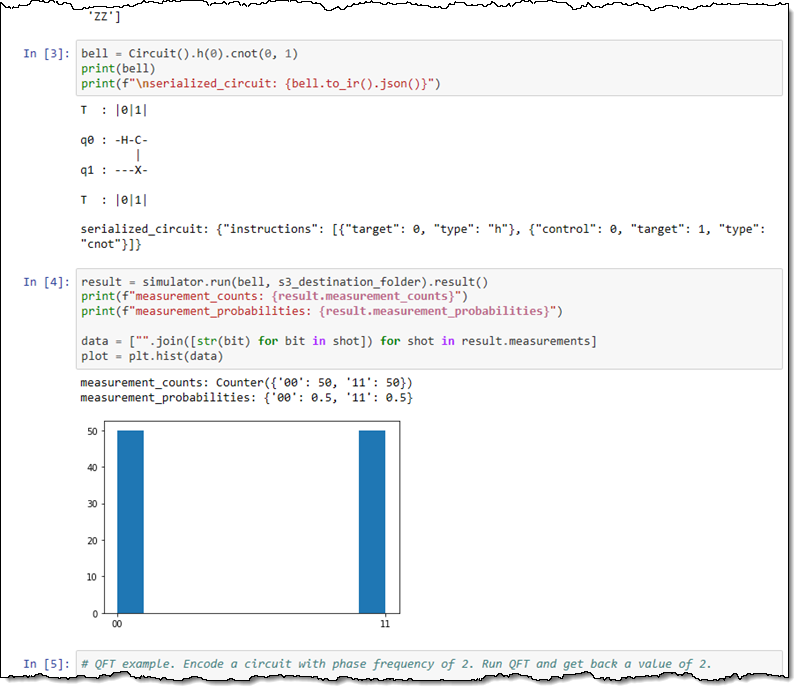
The Python code makes use of the Amazon Braket SDK. You can create a quantum circuit with a single line of code (this is, according to my colleagues, a “maximally entangled Bell state between qubit 0 and qubit 1”):
bell = Circuit().h(0).cnot(0, 1)
And run it with another:
print(device.run(bell, s3_folder).result().measurement_counts())
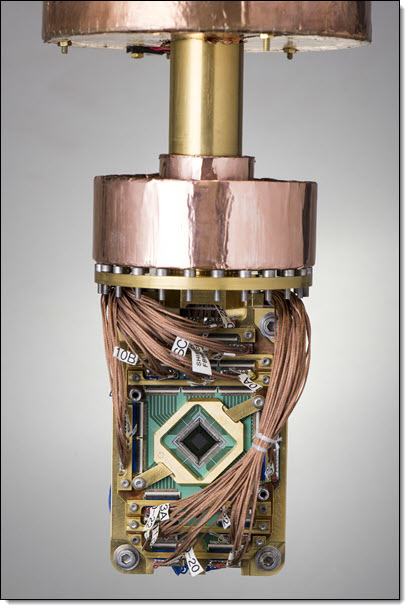
In addition to the classically-powered simulation environment, Amazon Braket provides access to quantum computers from D-Wave, IonQ, and Rigetti. These devices have a couple of things in common: they are leading-edge tech, they are expensive to build and run, and they generally operate in a very extreme and specialized environment (supercooled or near-vacuum) that must be kept free of electrical, thermal, and magnetic noise. Taken together, I think it is safe to say that most organizations will never own a quantum computer, and will find the cloud-based on-demand model a better fit. It may well be the case that production-scale quantum computers are the first cloud-only technology.
The actual quantum computers are works of art, and I am happy to be able to share some cool pictures. Here’s the D-Wave 2000Q:
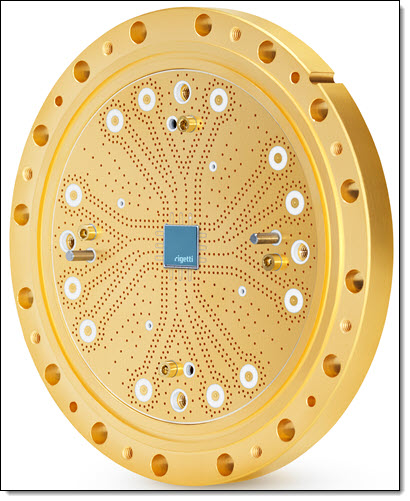
The Rigetti 16Q Aspen-4:
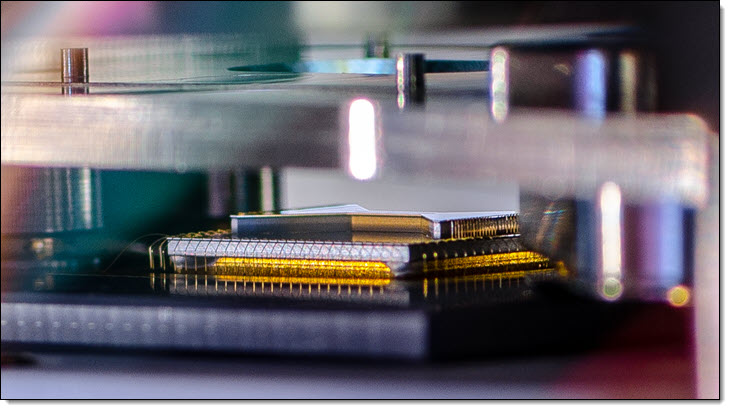
And the IonQ linear ion trap:
AWS Center for Quantum Computing
As I noted earlier, quantum computing is still a very young field; there’s a lot that we don’t know, and plenty of room for scientific and technological breakthroughs.
I am pleased to announce that we are forming the AWS Center for Quantum Computing. Located adjacent to the Caltech campus, our goal is to bring the world’s top talent together in order to accelerate development. We will be researching technology that might one day enable quantum computers to be mass-produced, while also working to identify applications that are best solved on quantum computers. Both of these are long-term challenges, and I look forward to watching the progress over the next decade or two.
Amazon Quantum Solutions Lab
We understand that this is a new and intriguing technology, and we know that you want to learn, build your skills, and make some plans to put quantum computing to use.
The Amazon Quantum Solutions Lab will allow you to tap into our own expertise and that of our consulting partners. Our goal is to work with you to find those practical uses, and to help you to build up your own “bench” of qualified quantum developers.
You will also be able to take advantage of research and collaboration opportunities at the Quantum Solutions Lab.
Quantum Computing Resources
Here are some of the reference materials that you might find useful. Some of this will make your head spin, but if I can understand even a little bit of it, then so can you:
The Quantum Computing Party Hasn’t Even Started Yet – A very gentle overview of the field.
Wikipedia – Quantum Computing – A good summary, with lots of links and diagrams.
How Quantum Computers Break Encryption | Shor’s Algorithm Explained – Helpful video. Skip ahead to 8:03 if you want the TL;DR.
Quantum Computation and Quantum Information – The definitive (so they say) textbook on the subject.
Quantum Computing for the Determined – A series of 22 short explanatory videos, starting with The Qubit.
Quantum Computing for the Very Curious – A long-form article by the author of the preceding videos.
Quantum Computing Expert Explains One Concept in 5 Levels of Difficulty – Like the title says, quantum computing explained to 5 different people.
Quantum Supremacy Using a Programmable Supercomputing Processor – An important result, and a major milestone that shows how a quantum computer can outperform a classical one for a particular type of problem. Be sure to read Scott Aaronson’s Supreme Quantum Supremacy FAQ as well.
This is What a 50-qubit Quantum Computer Looks Like – A stunning photo-essay of IBM’s 50-qubit computer.
Shtetl-Optimized – Professor Scott Aaronson has been researching, writing, and blogging about quantum computing for a very long time.
— Jeff;


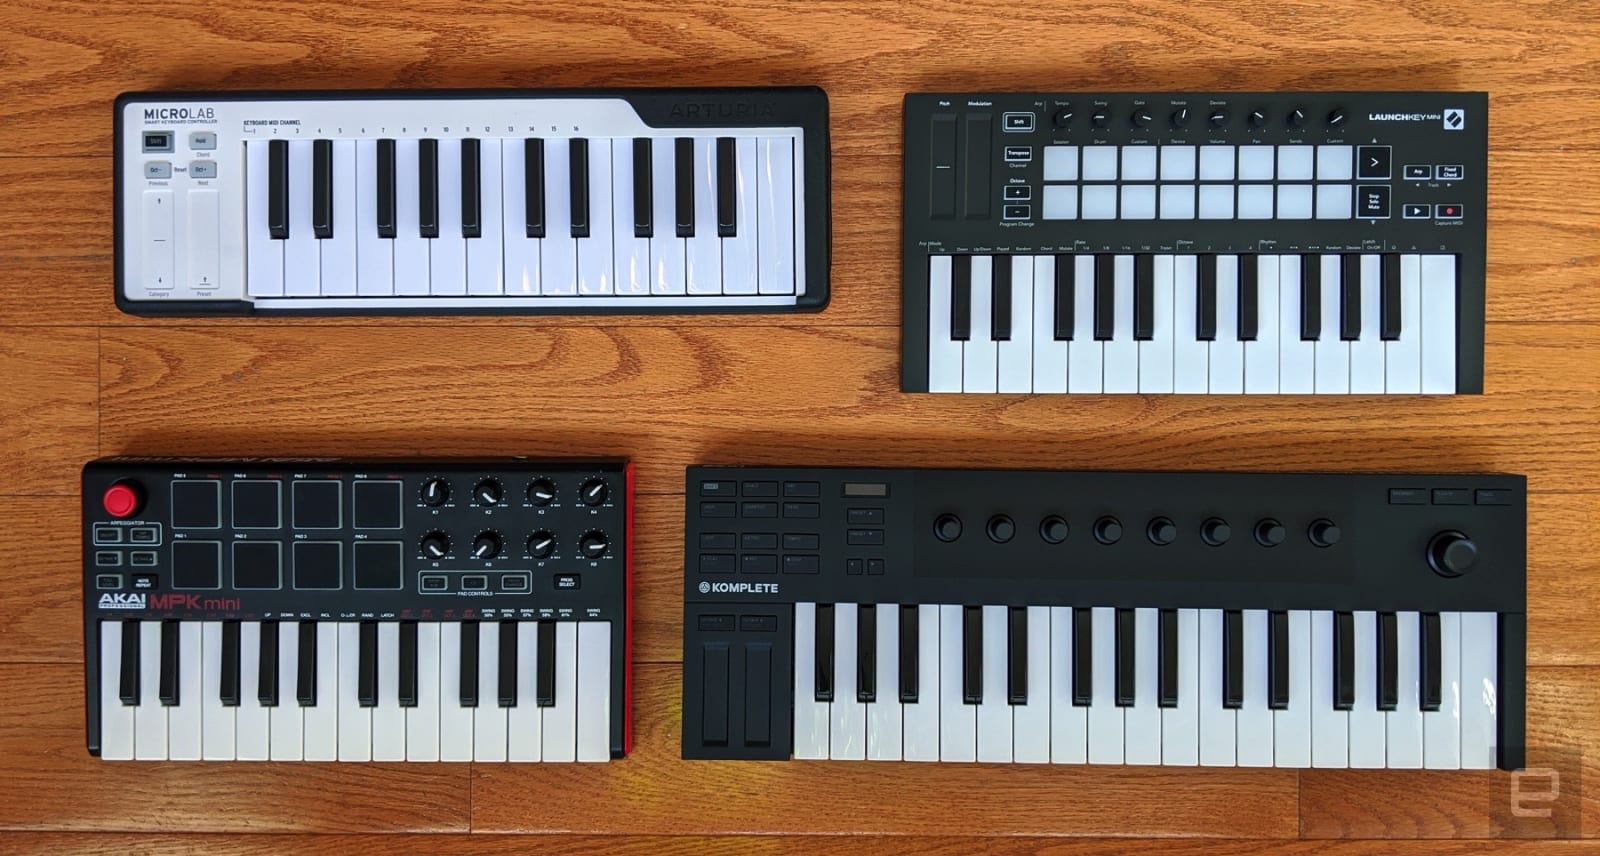
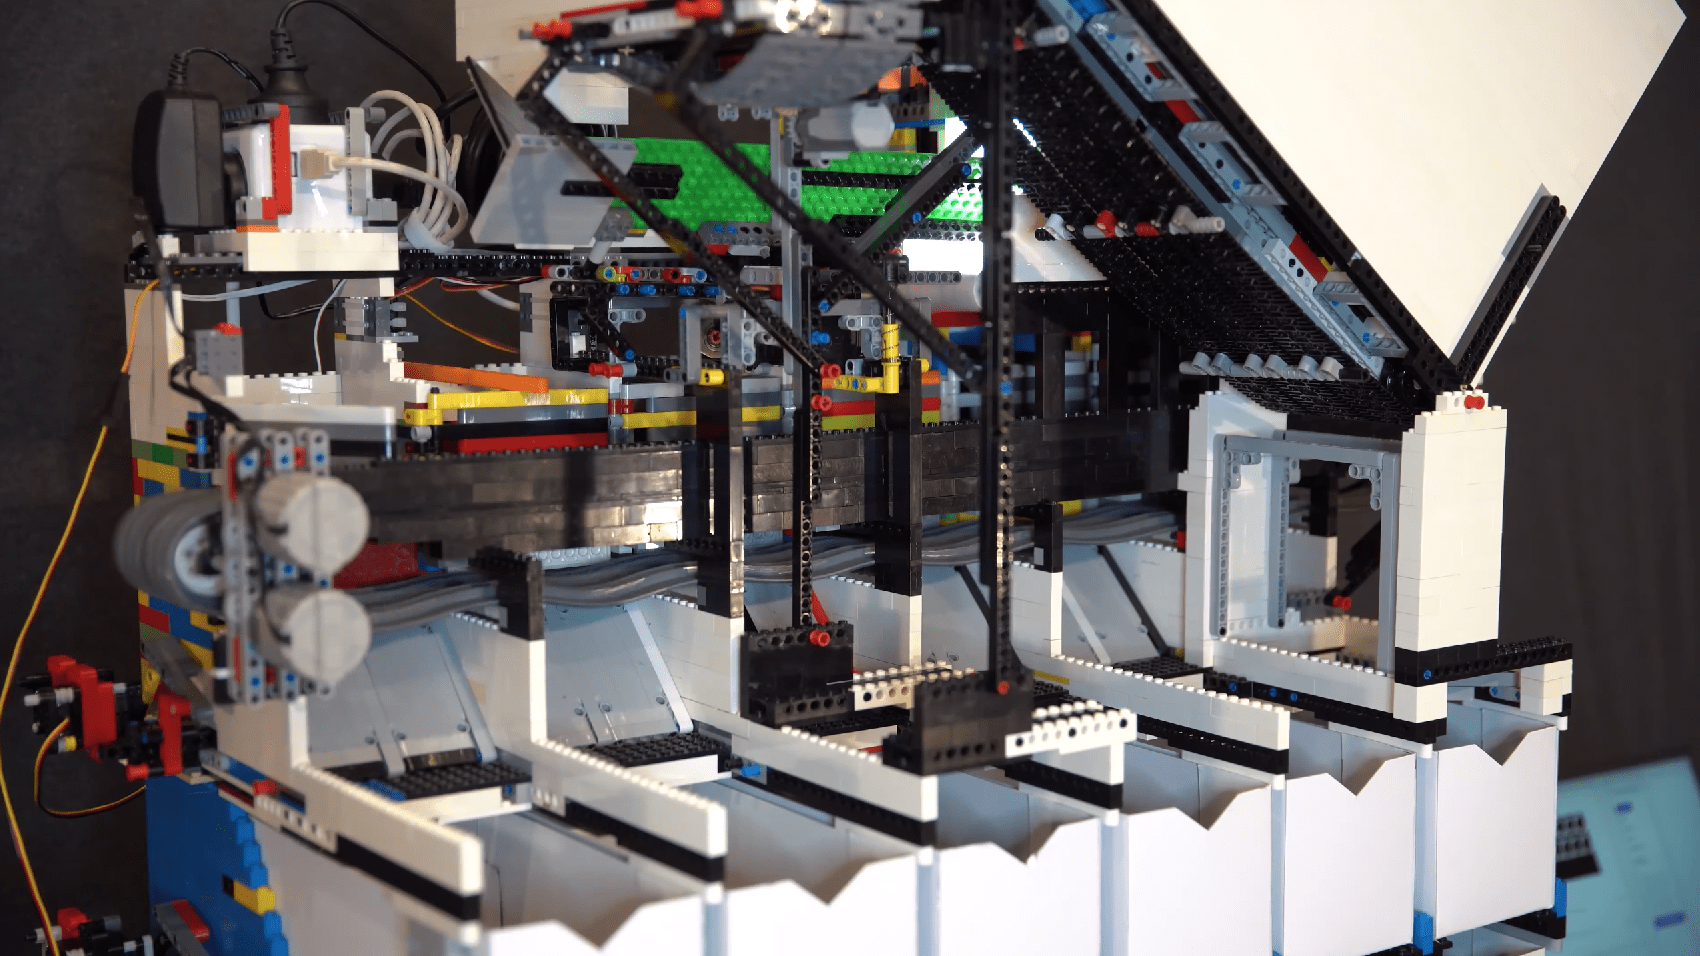 For some people, rummaging through a bunch of Lego bricks is part of the fun. But if you've got an enormous collection or take on complicated builds, you probably have a system for sorting your pieces. Your solution probably doesn't involve AI, thoug…


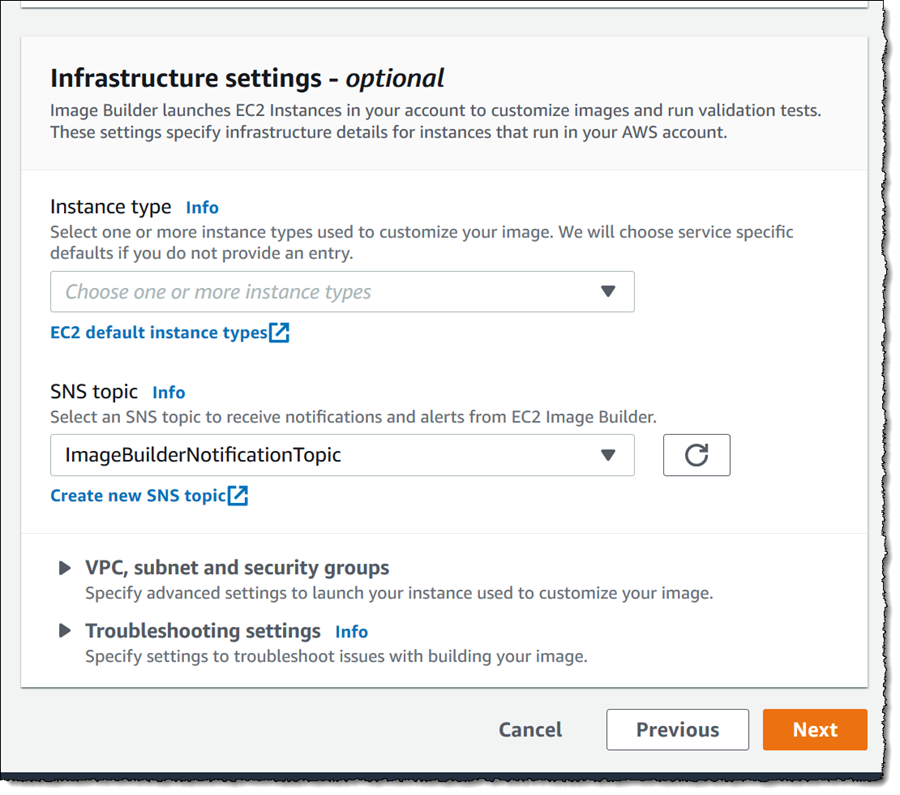
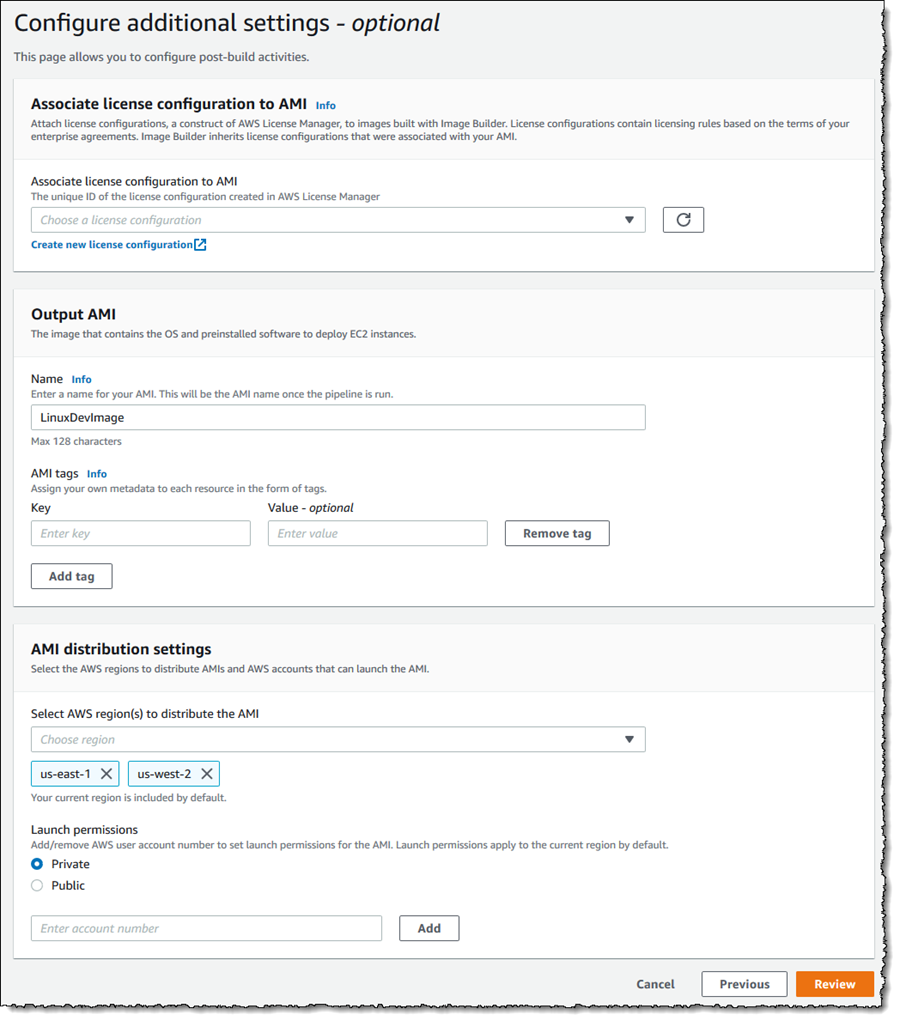
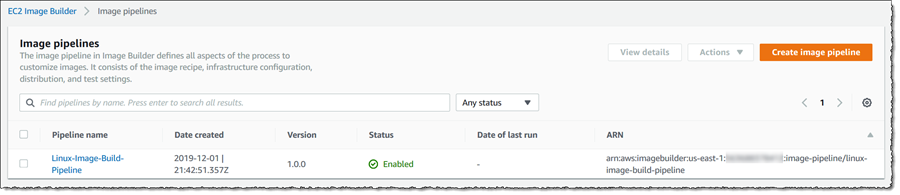
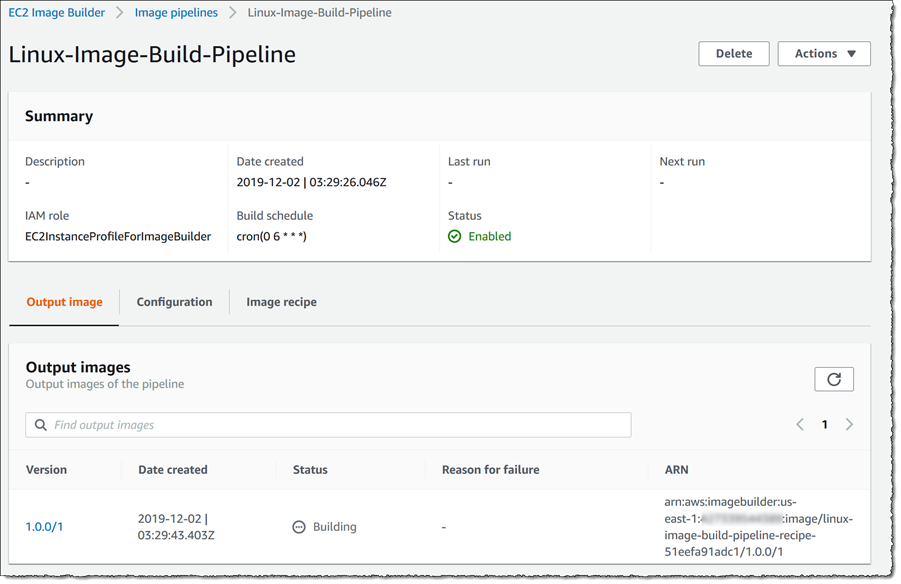


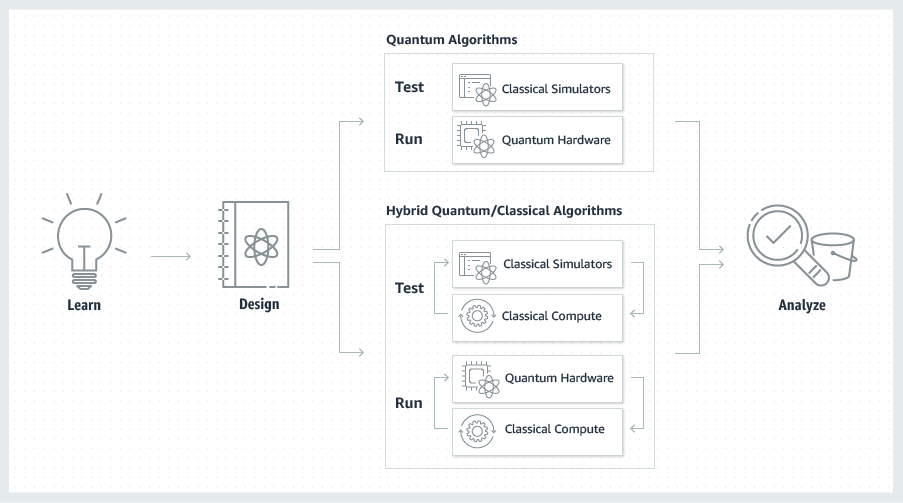


 Figure 1: Anonymous access to SharePoint and OneDrive documents (image credit: Tony Redmond)


 Microsoft sometimes discontinues or retires its products without providing enough information as to why they are doing it. There were some good products that were still in demand, but Microsoft refused to continue them. This post looks at discontinued as


 WhatsApp has become an integral part of everyday communication with friends, family, colleagues, etc. If you spend most of the time with your computer, and you have multiple WhatsApp accounts, you can check out this free software called Altus. Altus


![Network World [slideshow] - Top 10 Supercomputers 2018 [slide-01]](https://images.idgesg.net/images/article/2018/06/nw_ss_top_ten_supercomputers_2018_slide_01_1200x800-100762093-large.jpg)
 It's no secret Spotify wants to give you as many playlist options as possible, and today it's adding one more. Only this time, the streaming service wants to help you create a list for a specific activity: a road trip. With "Soundtrack your Ride," Sp…